WordPress
Connect WordPress to Adaptify SEO: one-click publishing, white-label plugins, metadata, security plugin fixes, and common troubleshooting.
WordPress integration with Adaptify SEO
This guide explains how to connect WordPress to Adaptify SEO, publish articles automatically, and troubleshoot common issues. It also covers agency white-label plugin branding, publishing issue alerts, and how Adaptify falls back when API publishing is blocked.
What WordPress integration enables
- One-click publishing from Adaptify to WordPress
- Automatic metadata handoff for supported SEO plugins (Yoast, Rank Math, AIOSEO Pro)
- Author, category, and tag selection inside Adaptify
- Better visibility into publishing failures and site connection status
When you set up your website in Adaptify, go to Enable One-click Publishing, select WordPress, and follow the on-screen steps to install the plugin and connect your site.
White-labeled WordPress plugin (Agency Plan)
Many agencies prefer that plugins on client sites do not mention Adaptify. Adaptify supports a self-updating branded plugin that you configure in your account: set the plugin name, set the author name, download a generated ZIP, and install it on any client WordPress site.
- The branded plugin is self-updating, so future updates appear as normal WordPress plugin updates.
- Plugin branding is saved at the team level. If one team member configures it, everyone on the team can use the same branded plugin.
Where to configure it
Go to My Account → WordPress Plugin. There you can edit the plugin name and author name, see a preview, and download the branded plugin again any time.
What changes in the One-Click Publishing flow
- Agencies (and anyone who has already configured a branded plugin) go straight to the branded plugin — no plugin choice is shown.
- Other users can choose between the public Adaptify plugin and a branded plugin.
Installing the plugin on WordPress
Option A: Upload and install the Adaptify ZIP plugin
- In Adaptify, open One-Click Publishing for the site and copy the connection code.
- Install and activate the Adaptify plugin on WordPress (from WordPress.org or the ZIP).
- In WordPress, open Settings → SEO One-Click Publishing, paste the connection code, and click Connect.
- Adaptify updates this page automatically once the site connects — no manual confirmation needed.
Option B: Upload and install the branded ZIP plugin
- In Adaptify, open One-Click Publishing and copy the connection code.
- In WordPress admin, go to Plugins → Add New → Upload Plugin and choose the branded ZIP.
- Click Install Now, then Activate. The plugin shows your agency branding, not Adaptify.
- In WordPress, open Settings → SEO One-Click Publishing, paste the connection code, and click Connect.
- Adaptify updates automatically once the site connects — no manual confirmation needed.
Reconnect after any changes
To reconnect after reinstalling, reactivating, or switching WordPress users, copy the connection code from Adaptify and paste it into Settings → SEO One-Click Publishing in WordPress, then click Connect. Adaptify updates automatically (see Changing users).
WordPress publishing fallback (API → CRON)
Adaptify normally publishes to WordPress via the WordPress REST API. In some environments the API can be blocked — for example security plugins blocking REST requests, hosts or firewalls blocking application passwords, or aggressive rules that break the block editor API. Adaptify may then automatically switch to a fallback publishing method.
- The fallback method is more robust in restrictive environments.
- It can take more time than API publishing.
- If the site URL is invalid or the plugin is not installed, the fallback will fail after roughly one hour and Adaptify will surface a publishing issue.
- If you see publishing problems, the dashboard Publishing issues badge is the quickest place to start.
Publishing issue alerts
Adaptify detects publishing errors. You will see a Publishing issues badge on the dashboard per site. This helps agencies catch issues early, before clients notice missing content.
Authors, categories, and tags
Authors
- Adaptify can pull WordPress users as authors.
- The WordPress user must be Contributor or above. Subscribers do not appear because they cannot create content.
Categories and tags
- Categories are pulled from WordPress. You can select categories per article and refresh if you recently created new categories.
- Tags are only shown if tags exist on the WordPress site. Some sites do not use tags.
Refreshing data after changes
If you add authors, categories, or tags in WordPress, return to the article details in Adaptify and use Refresh to re-pull the latest values. Refresh can take around a minute because it re-syncs multiple items.
Best practice: create categories in WordPress first, then set your category selection logic under Writing Style → Advanced Writer Settings. This works best when the target categories already exist in WordPress.
What metadata Adaptify sets when publishing
When an article is published via One-Click Publishing, Adaptify automatically sets the key metadata WordPress expects. This reduces manual cleanup and ensures SEO plugins receive the correct fields.
- Post title and URL slug
- Excerpt (when supported by the theme)
- Featured image, categories, and tags (if enabled)
- Author
- Meta title and meta description (via supported SEO plugins)
- Social metadata (when supported)
If metadata is missing, common causes are: SEO plugin REST API disabled, a security plugin blocking API access, application passwords disabled, or publishing fallback mode being triggered. See Security and caching plugins below.
How Adaptify handles images
Adaptify automatically handles article images during publishing, including compression and SEO metadata.
Image compression
All images are compressed and optimized before publishing. Compression adapts to content and layout. If your site has strict image requirements, theme-specific sizing, or custom CDN rules, contact support@adaptify.ai for advice.
Image hosting behavior
- Header (featured) images are uploaded directly into your WordPress media library.
- In-content images are hosted on a whitelabeled CDN and embedded in posts — for SEO performance and to avoid bandwidth issues on your site. You remain free to host images yourself if you prefer.
SEO plugin support
It is a good idea to have an SEO plugin on your WordPress website. When you install the Adaptify plugin we automatically populate relevant metadata for supported plugins.
Yoast
We fully support Yoast and have optimised articles for strong Yoast scores.
Rank Math
We fully support Rank Math. Rank Math is feature-rich and includes capabilities that complement Adaptify SEO well.
AIOSEO Pro
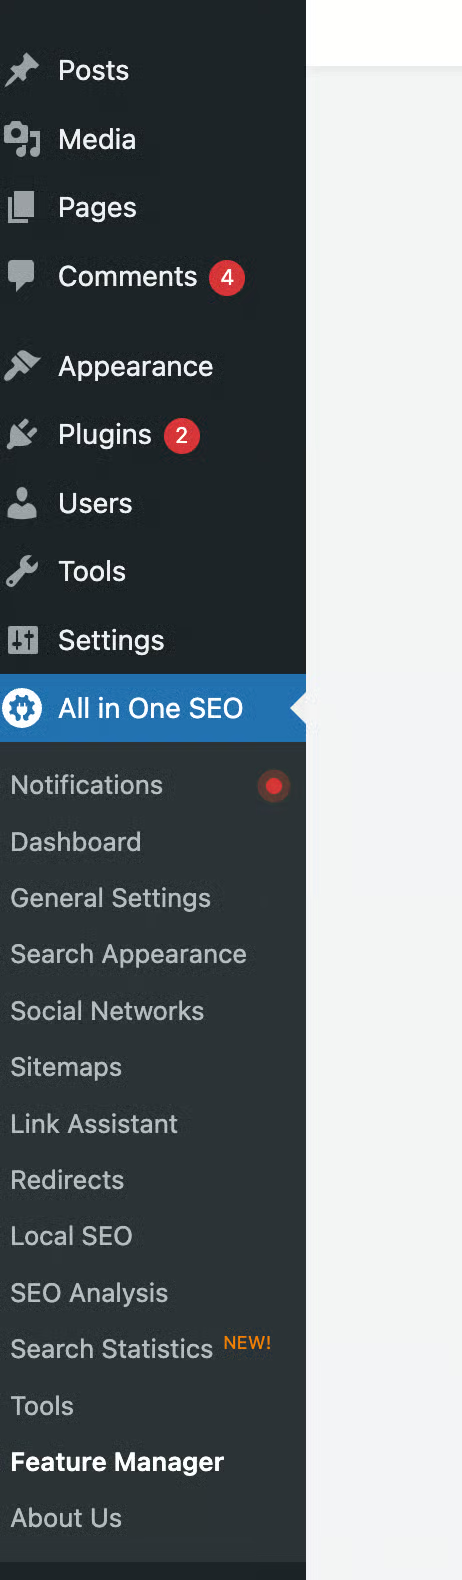
We only support the paid version of All in One SEO (AIOSEO Pro). To integrate AIOSEO with Adaptify:
- You must have at least a Plus user account with AIOSEO.
- In WordPress: All in One SEO → Feature Manager → toggle REST API to Activated.
WordPress plugins with potential conflicts
Security, cache, and some host plugins can block application passwords or the REST API. If publishing fails, work through the plugin that matches your site below.
WordFence
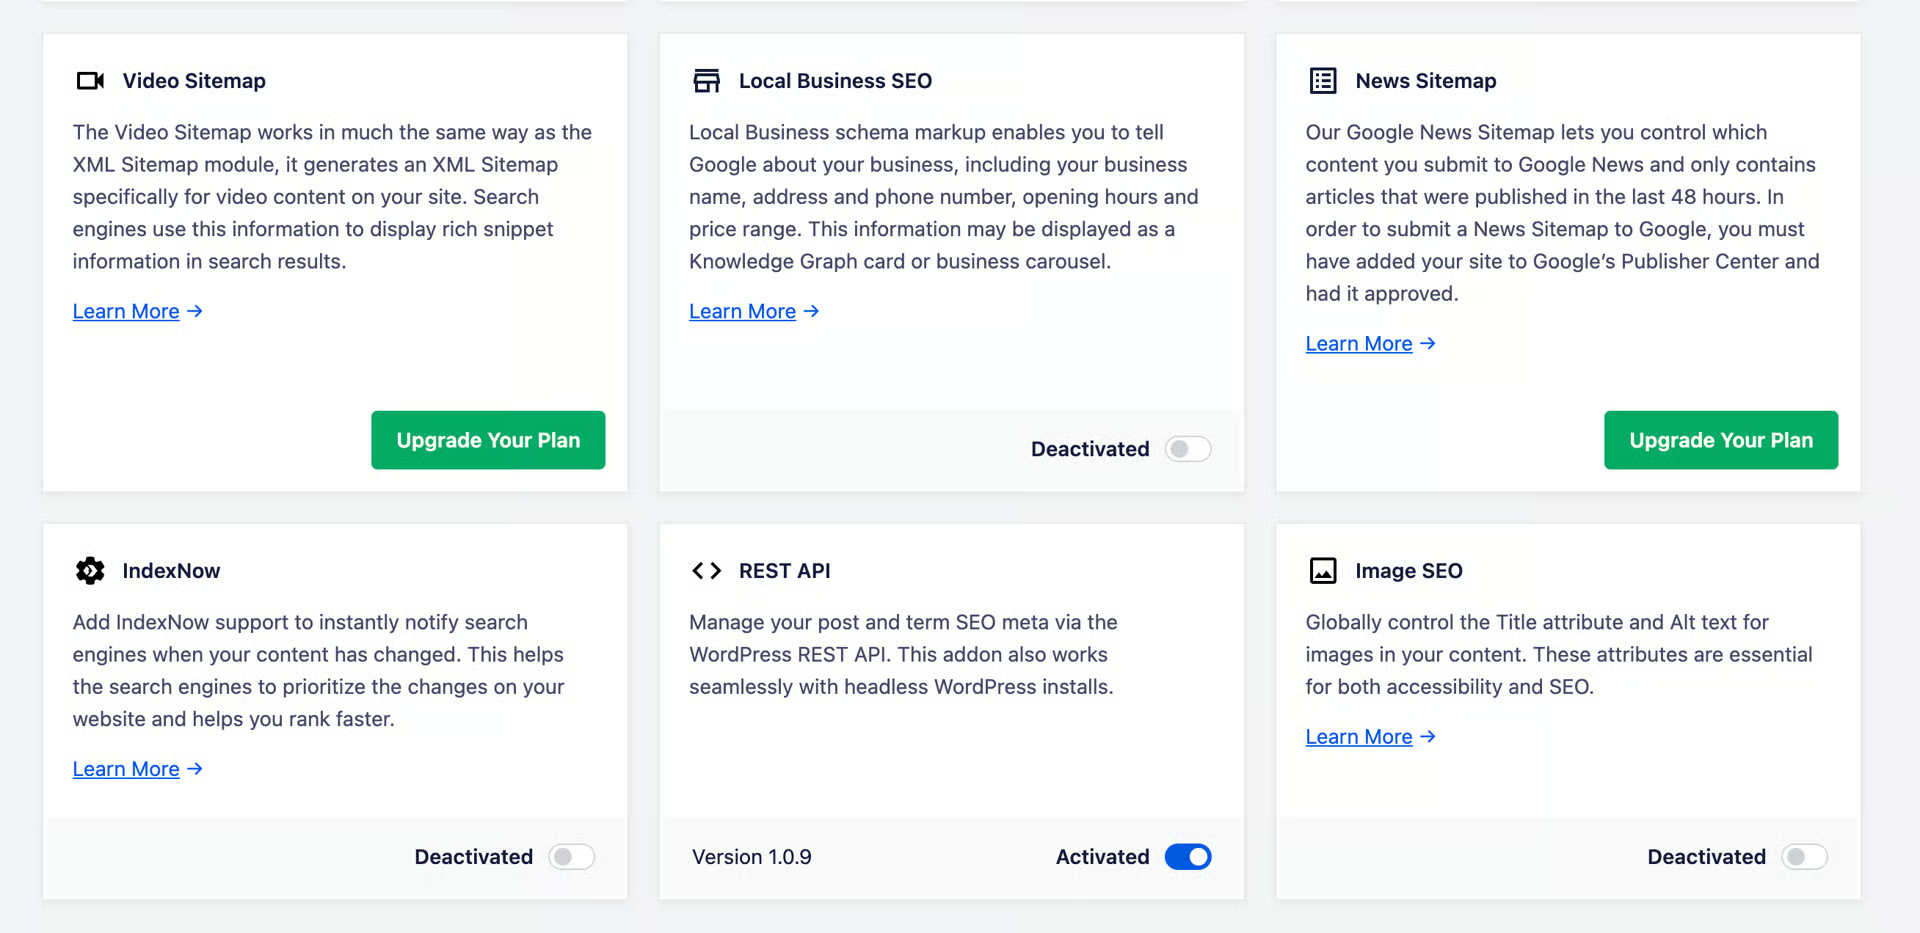
By default, WordFence can block publishing. Disable “Disable WordPress application passwords”. On newer WordFence versions this is under Firewall → Brute Force Settings. On older versions, look under Settings → Additional Options. Some older WordFence versions have no granular settings — upgrade WordFence or temporarily disable the plugin to test.
The firewall can also block posting. Rank Math published a useful guide on whitelisting in WordFence: https://rankmath.com/kb/whitelist-rank-math-in-wordfence/
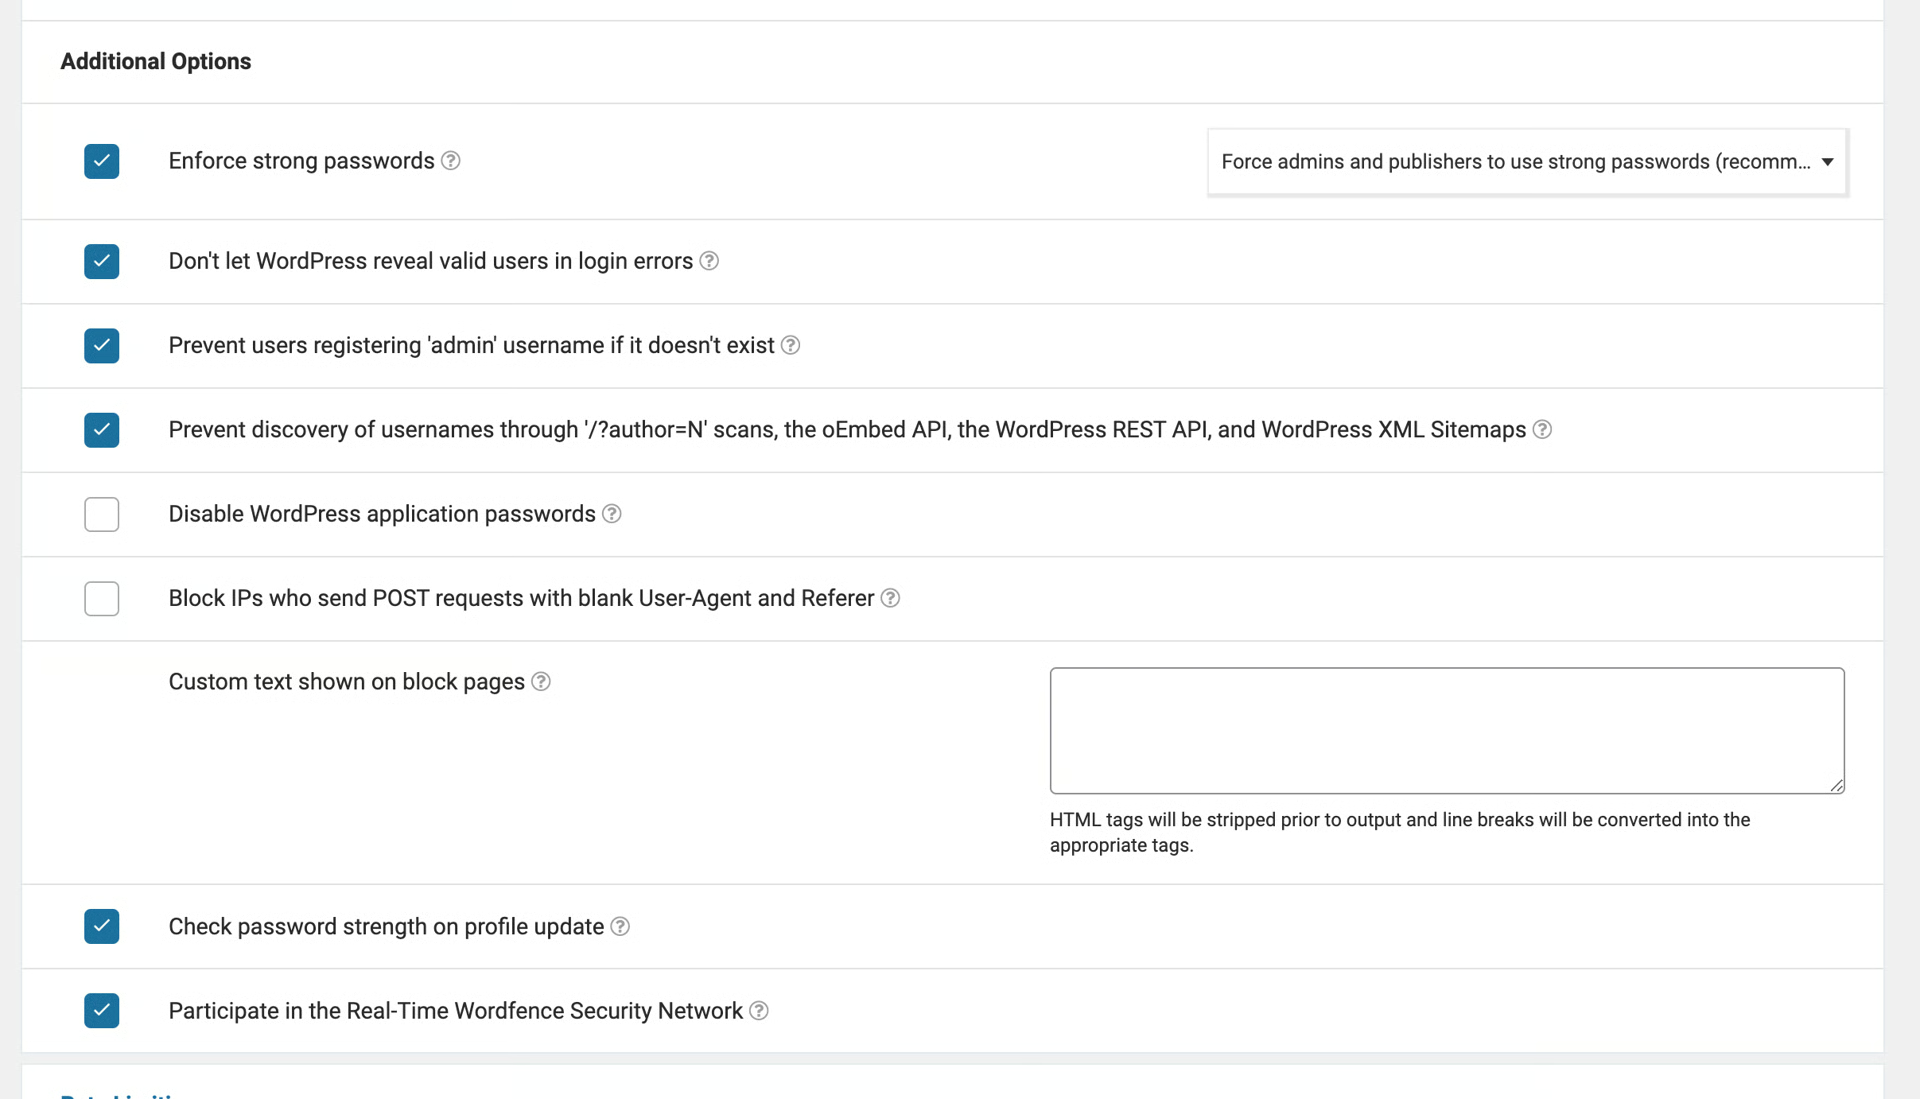
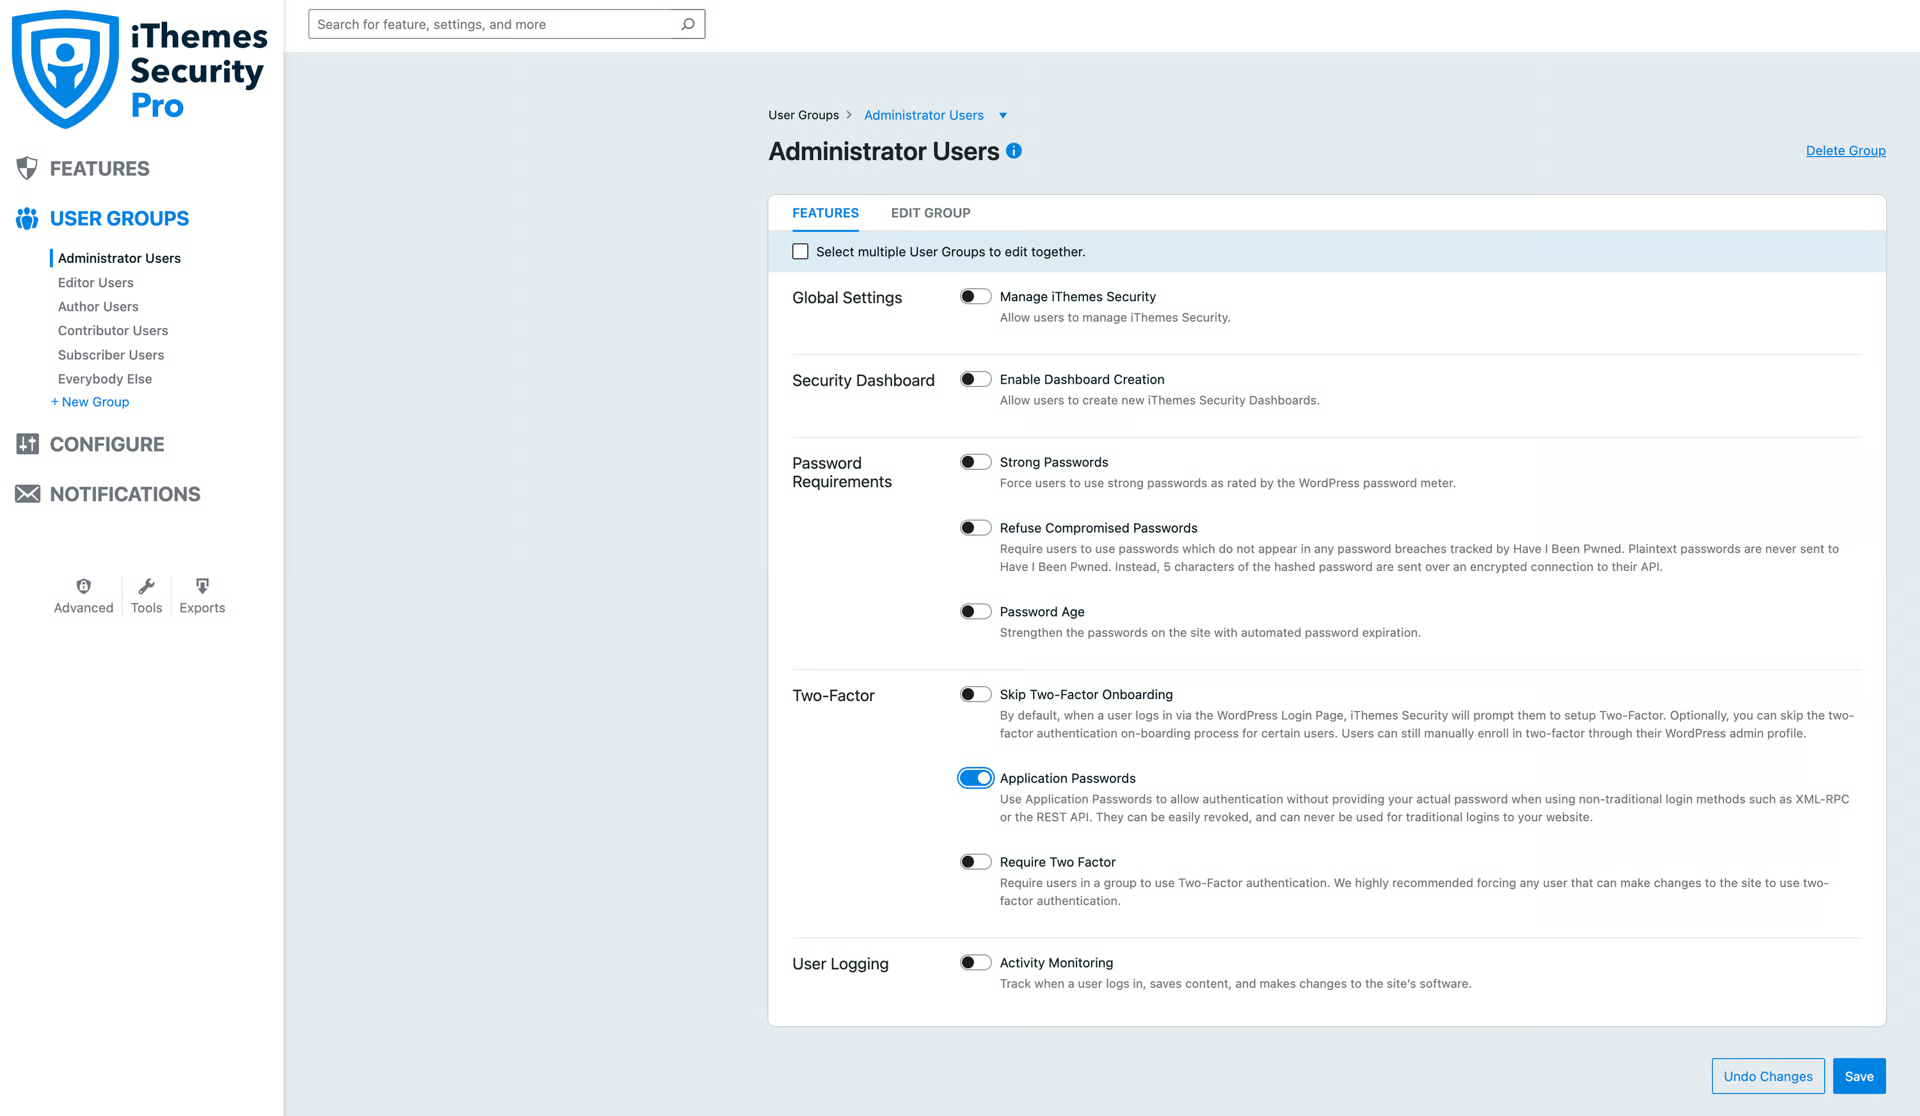
iThemes Security Pro
Similar to WordFence, in iThemes Security Pro, Application Passwords need to be enabled in order for Adaptify to work. You can do this by navigating to User Groups → Administrator Users. And then under “Two-factor” enable the “Application Passwords” switch:
PatchStack
PatchStack disables WordPress application passwords and does not offer granular control. The only option is to disable PatchStack and use another security plugin (such as WordFence with the correct settings) instead.
SolidSecurity by SolidWP
SolidSecurity is not compatible with Adaptify SEO out of the box. If Adaptify is already installed, make the changes below first, then set up Adaptify SEO again.
Setting up two-factor and application passwords in SolidSecurity
Follow these steps in order:
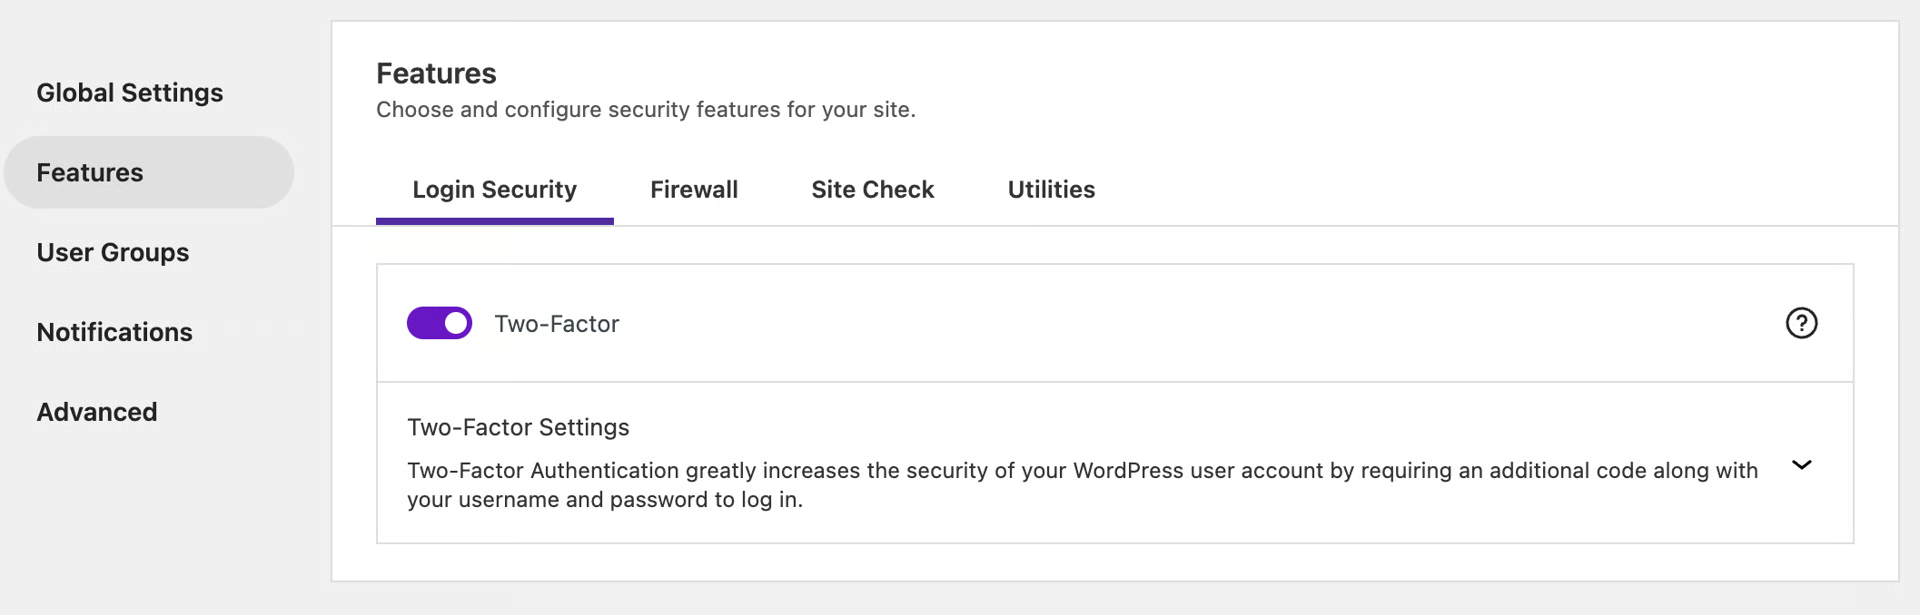
Step 1. Solid Security → Settings → Features → Login Security → Two-Factor: enable Two Factor Authentication (required before the next settings appear). Save.
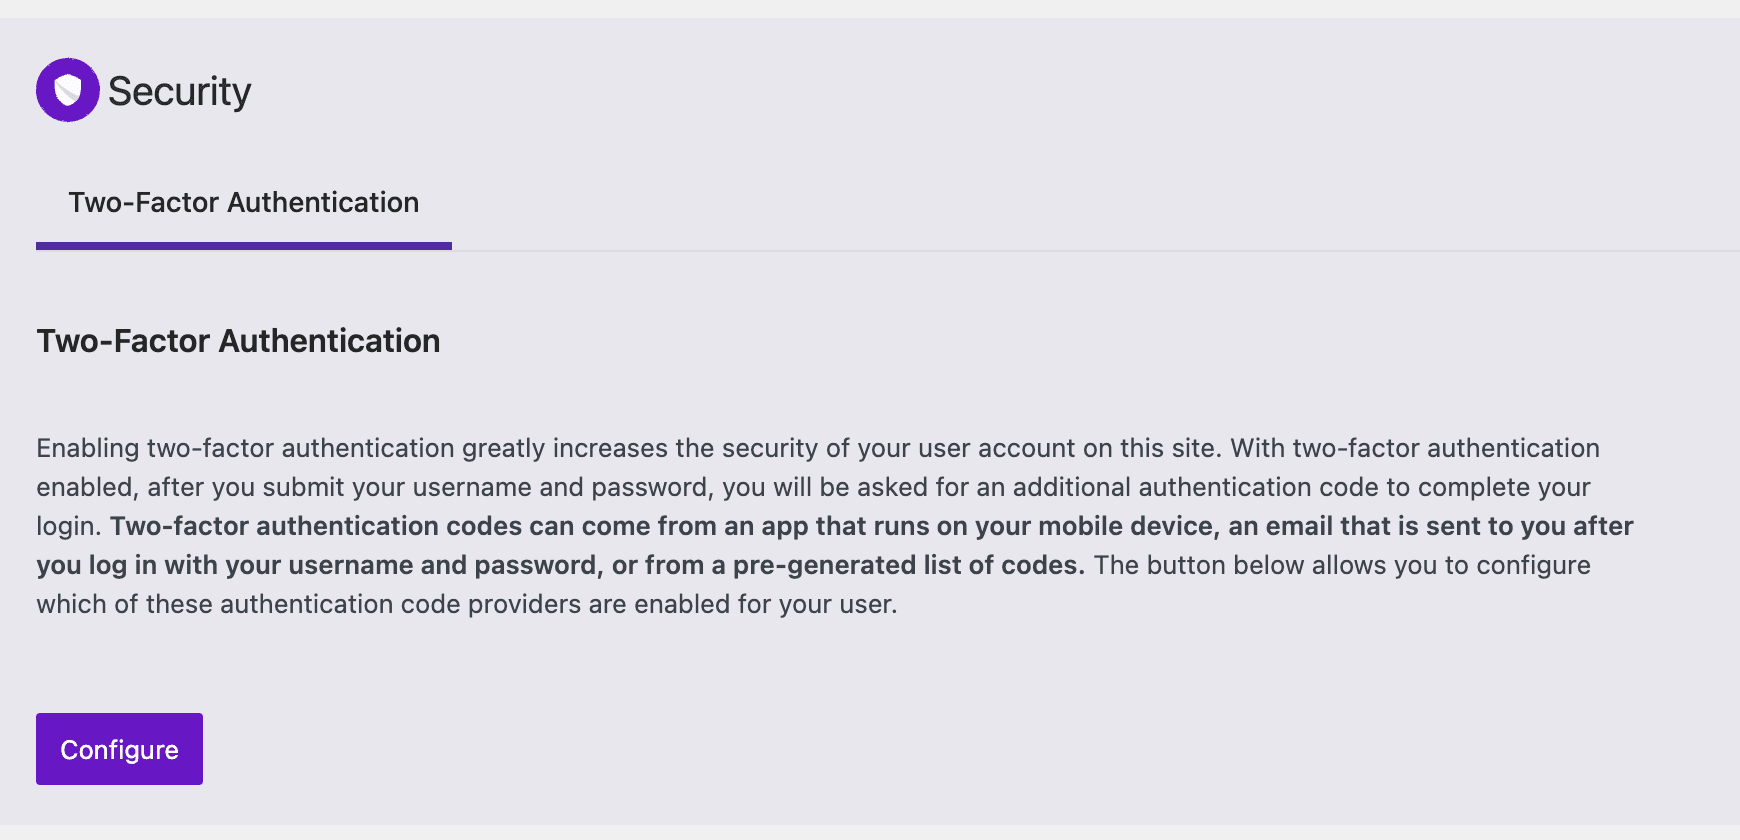
Step 2. Users: check your role (e.g. Administrator), open your username, scroll to Two-Factor Authentication, press Configure, and complete setup.
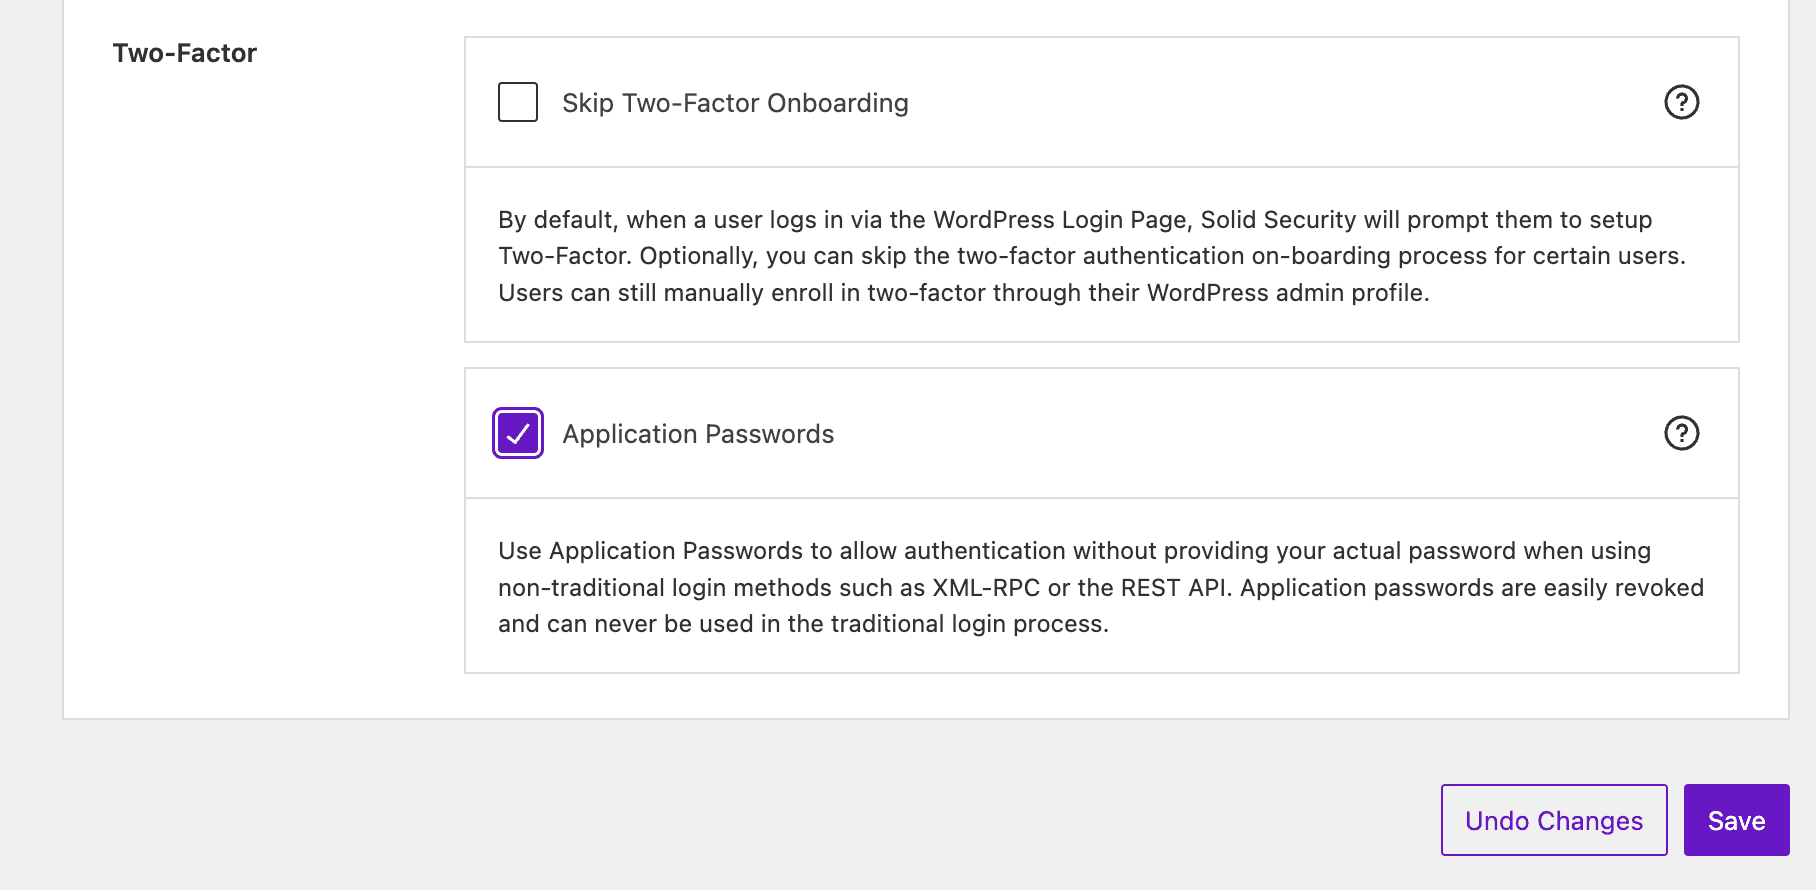
Step 3. Solid Security → Settings → User Groups → Features → Application Passwords: enable for Administrators and Editors (or your role from step 2). Save.
Step 4. In Adaptify: One-Click Publishing → confirm the WordPress URL is correct. (If you have not set up yet, follow the usual steps.)
Step 5. On the site: Plugins → Ada SEO by Adaptify → Deactivate → Activate, then paste the connection code from Adaptify into Settings → SEO One-Click Publishing, click Connect, and test-publish an article.
Other SolidSecurity checks:
Ensure API access is enabled with the expected settings.
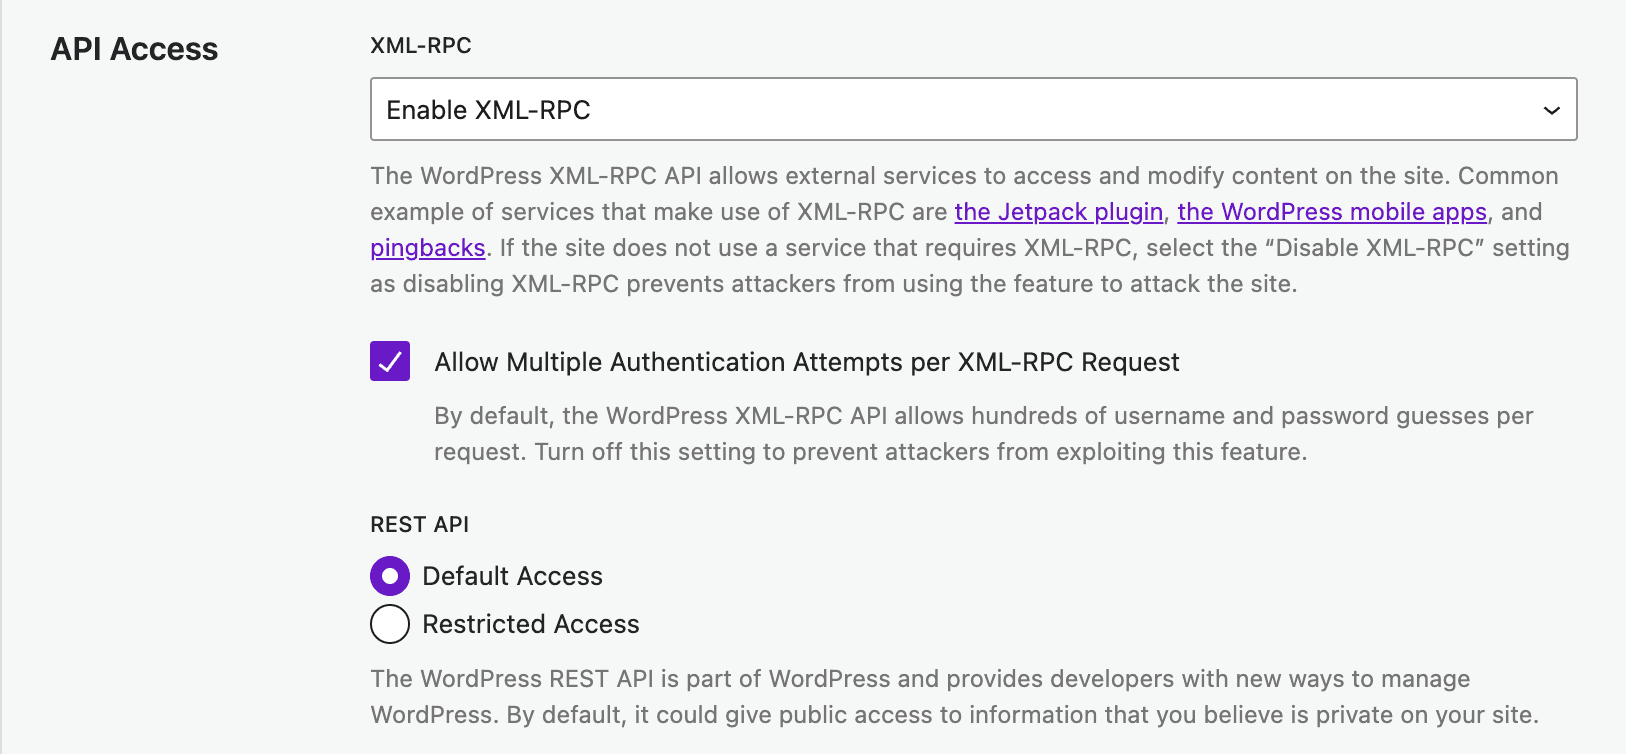
On the account used to activate the plugin, open the accounts page and confirm “All API Types” with Read Only disabled.

All In One WP Security
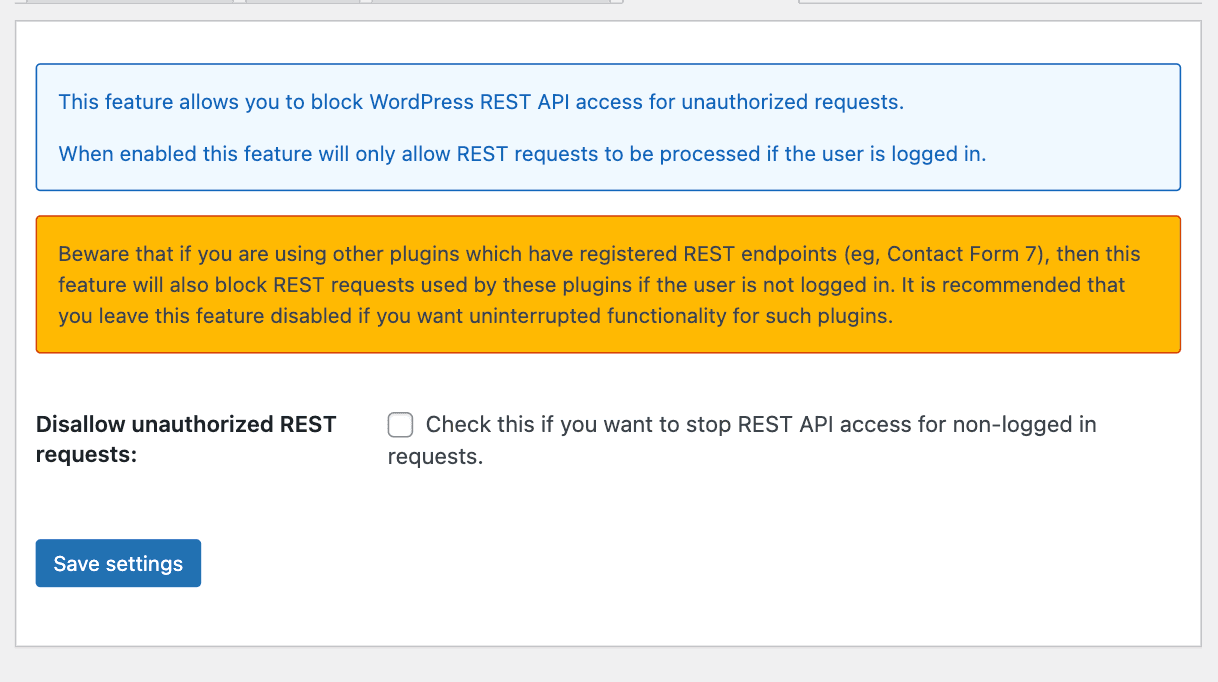
This plugin blocks application passwords without always showing an error in WordPress — articles still fail to publish in Adaptify. Under WP Security → User Login → Additional settings, deselect Disabled application password.
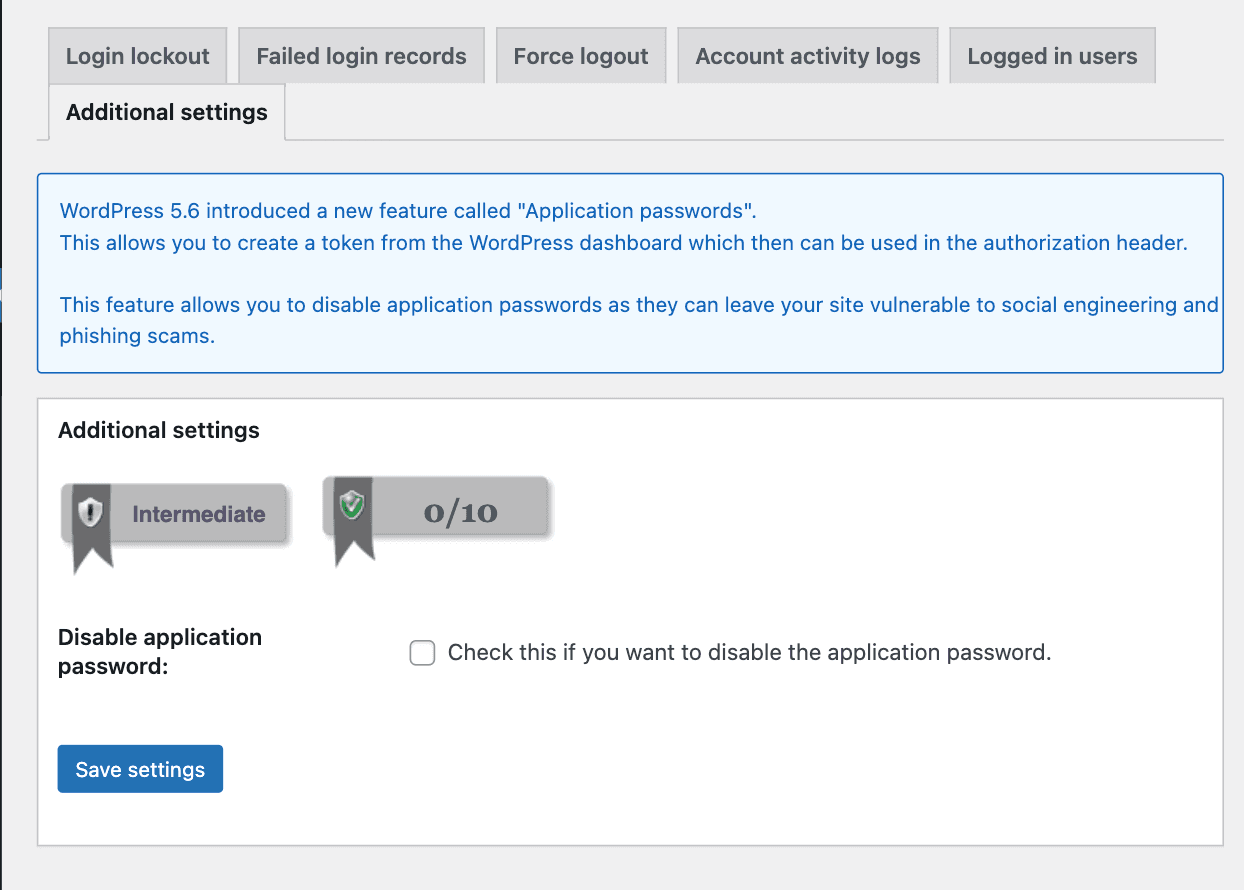
Also confirm the REST API is not switched off.
LiteSpeed Cache
LiteSpeed Cache can make the WordPress REST API inaccessible while optimizing pages, which prevents Adaptify from publishing. It does not offer a reliable way to exclude the API from cache — deactivate LiteSpeed (and use another caching plugin if needed, such as WP Rocket).
AUTO BLOG ENGINE 2.0 - WPO & Hostinger Tools
AUTO BLOG ENGINE 2.0 - WPO prevents Adaptify from publishing and must be disabled. Hostinger Tools blocks application passwords and must be disabled for Adaptify to work.
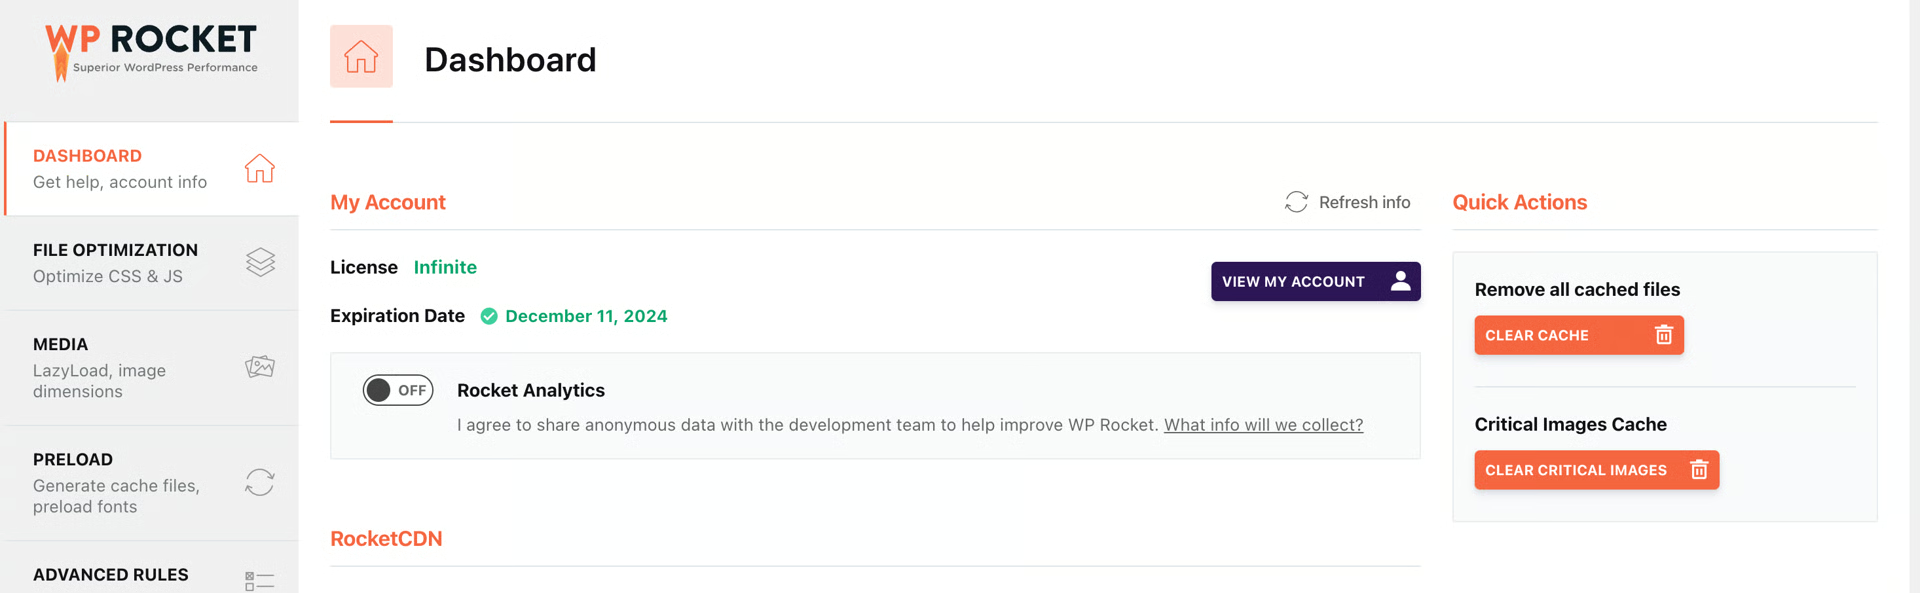
WP Rocket
WP Rocket is compatible with Adaptify SEO, but a clogged cache can block the REST API. In WP Rocket settings, press Clear Cache, then Clear Critical Images.
Changing users
- Log in as the new user in WordPress.
- In Adaptify, open the site → One-Click Publishing and copy the connection code.
- Deactivate and reactivate the plugin in WordPress.
- Open Settings → SEO One-Click Publishing, paste the connection code, and click Connect. Adaptify updates automatically.
Common issues
One-Click Publishing not working at all
- Confirm the plugin is active in WordPress.
- Confirm application passwords are enabled.
- Check security plugins (WordFence, SolidSecurity, etc.).
- Reset integration in Adaptify.
- Deactivate → Reactivate the plugin.
- Test publish a single article.
- If the dashboard shows a Publishing issues badge, open it first — it usually points to the root cause.
If unsure, email support@adaptify.ai and include the site URL, a screenshot of One-Click Publishing, and a screenshot of the WordPress plugins page.
Authors or categories missing
- Ensure the WordPress user is Contributor or higher.
- Press Refresh in article settings.
- Confirm the REST API is not blocked by security plugins.
- Application passwords require a user role that can publish posts.
Posts publish but formatting looks wrong
Common causes include editor plugins, themes that override list or heading styling, block restrictions, or page builder conflicts. Test with the default theme and check theme documentation.
Blog posts publish but do not appear on the blog page
If Adaptify shows a successful publish but the article is not visible on the site blog, this is almost always a WordPress display configuration issue — not a publishing failure. Adaptify publishes posts, not pages. The blog page decides which posts it shows.
- Blog page filtered to a specific category
- Theme excludes uncategorized posts
- Custom blog template only shows selected tags
- Caching delay
- Posts assigned to a hidden category
- Permalink structure recently changed
Fix: open WordPress → Posts → All Posts and confirm the article exists. Check which category was assigned and compare with categories on the blog page. Edit blog template or theme filters, assign the post to the main blog category, and clear site or CDN cache. Adaptify cannot create WordPress pages — only posts. Duplicate URLs are prevented automatically.
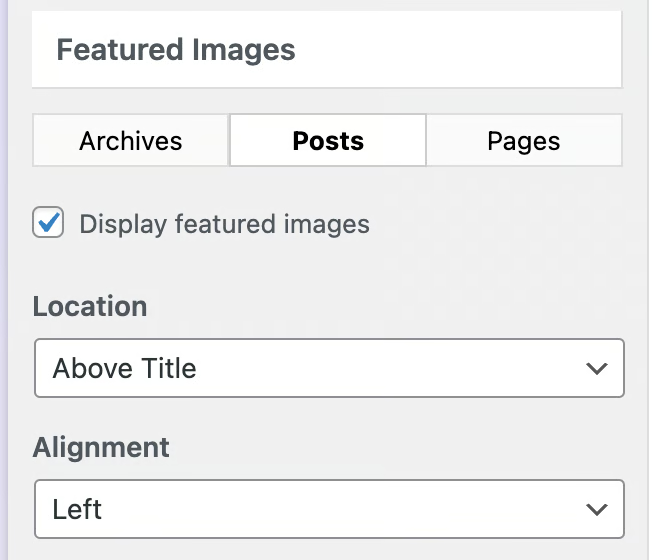
Header image not showing on blog post
Go to Appearance → Customize → Layout → Blog → Featured Images → Posts and check “Display featured images”.
Need help?
If you have any questions, email support@adaptify.ai and we will be glad to help.